
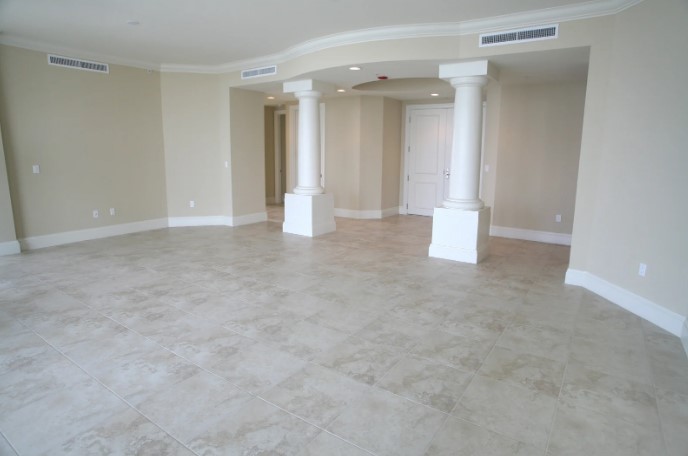
When embarking on a home renovation, few steps are more crucial than preparing your floors for new installation. Whether you’re upgrading to hardwood, tile, vinyl, or laminate, proper floor prep directly impacts the durability and appearance of your investment. Overlooking this essential stage can lead to costly damage, uneven surfaces, and unnecessary frustration. The company TAMPA BAY FLOORS provides comprehensive floor preparation services Tampa to help homeowners avoid these pitfalls and ensure professional results every time. Understanding what goes into floor preparation helps you make informed choices and protects your project from common headaches.
Subfloor Assessment and Moisture Testing: Laying a Solid Foundation
Every successful flooring project begins with a thorough evaluation of your existing subfloor. The subfloor serves as the foundational layer beneath your finish flooring, and its condition determines how well the new surface will perform. In older homes, subfloors often hide issues such as rotting wood, loose panels, high moisture, or uneven spots resulting from years of wear and tear. These imperfections must be addressed before any installation can begin.
Moisture testing is the next critical phase, especially if you are installing hardwood, engineered wood, or tile. Excessive moisture beneath your floors can cause warping, cupping, or adhesive failure. Modern testing methods like calcium chloride tests and moisture meters provide accurate readings, allowing you to detect issues before they jeopardize the outcome. For concrete subfloors, moisture barriers or sealants may be necessary to protect against vapor transmission.
After confirming a stable, dry subfloor, leveling becomes the focus. High and low areas must be smoothed out with self-leveling compounds or patching materials. Even minor fluctuations in flatness can telegraph through rigid surfaces like tile or luxury vinyl, causing tiles to crack or planks to separate. Proper leveling delivers uniform support and a professional, finished appearance.
The final step involves cleaning the subfloor of dust, oils, and debris. Even tiny particles can interfere with adhesives or underlays. Professional-grade vacuums and cleaning solutions remove contaminants that might prevent a strong, lasting bond. Failure to take these steps compromises installation quality and may shorten the lifespan of your new floor.
Addressing Old Flooring and Surface Preparation for Different Materials
Once subfloor inspection is complete, the next challenge is preparing the actual surface for installation. In many cases, this means removing existing flooring materials, such as carpet, vinyl, tile, or laminate. This step is more than just tearing out the old — it requires skill to avoid damaging the subfloor underneath and careful disposal to avoid exposing your home to dust or asbestos from older adhesives.
If you are dealing with tile removal, for example, a hammer and chisel may be needed to break up stubborn sections, while removing old vinyl often involves scraping up glue residue. Any protruding nails, staples, or old adhesive must be fully removed. In some cases, sanding or grinding is used to provide a perfectly smooth surface for the new flooring material.
Different flooring types require specific preparation methods:
- Hardwood and engineered wood demand a clean, dry, and level subfloor, often with an underlayment for sound and moisture protection.
- Tile installation may involve applying cement backerboard or waterproof membranes, plus meticulous leveling to avoid cracking.
- Luxury vinyl and laminate floors usually need a moisture barrier and flat underlayment to prevent flexing or shifting.
- Carpet installation benefits from a tackless strip system and a smooth, debris-free base.
For homeowners seeking a one-stop solution, TAMPA BAY FLOORS offers a complete floor service in Tampa ensuring that each unique material gets the attention it requires for optimal results. Quality prep saves time, money, and stress while delivering a superior finished product.
Professional Techniques and Tools: Achieving Commercial-Grade Results
Residential and commercial floor installations use advanced methods and tools to ensure long-lasting, flawless results. Key techniques include floor grinding, shot blasting, and the application of primers or moisture sealers.
Precision Floor Leveling
Achieving a perfectly level surface is essential for installations such as tile, luxury vinyl, and hardwood. Self-leveling compounds are poured and spread across the surface, filling in dips and smoothing out imperfections. These products cure quickly and form an ideal base for adhesives or floating floors.
Installation of Underlayment Materials
Underlayment adds structural strength, moisture resistance, and sound reduction. Depending on the flooring type, installers may use foam, cork, plywood, or cement board. Each material is selected and installed based on the floor’s final use and the environment.
Adhering to Manufacturer Guidelines
Adhesive selection and application are critical. Following the manufacturer's instructions for mixing, spreading, and curing adhesives prevents bonding failures and warranty issues.
For more complex jobs like walk-in showers or bathroom upgrades, the company TAMPA BAY FLOORS helps homeowners tackle unique challenges with services such as https://tampabayfloors.us/services/bathroom-shower/shower-mud-bed-installation. Proper prep ensures watertight seals and long-lasting tile surfaces.
A checklist for successful floor preparation includes:
- Inspecting and repairing subfloor damage
- Conducting moisture and humidity tests
- Leveling with compound or patching materials
- Removing all traces of old flooring and adhesive
- Cleaning and vacuuming the subfloor
- Installing appropriate underlayments or moisture barriers
- Verifying flatness and readiness before installation
Common Floor Preparation Mistakes and How to Avoid Them
Even experienced DIYers can overlook critical prep steps, resulting in expensive repairs and disappointing outcomes.
Skipping moisture testing is among the most frequent mistakes. Hidden dampness destroys wood floors, bubbles vinyl, and loosens tile adhesives. Always perform thorough tests, especially in basements or on concrete.
Inadequate leveling is another error. Even small undulations can cause visible flaws that worsen over time. Invest in quality leveling products and don’t hesitate to call in professionals for large or complex areas.
Neglecting old adhesive or debris leaves bumps and weak spots. Meticulous cleaning is non-negotiable for premium results. Rushing preparations to speed up installation only leads to headaches and higher costs down the road.
For homeowners juggling timelines, budget, and peace of mind, expert floor preparation offers the best insurance against preventable problems. A skilled contractor will spot issues that an untrained eye might miss and ensure every detail is handled before the first plank or tile is set.
Ensuring Long-Term Performance and Value with Proper Floor Preparation
The investment in proper floor preparation pays dividends for years to come. Floors that start with a solid foundation experience fewer failures, maintain their appearance, and withstand the demands of daily life. By choosing experienced professionals, using the right materials, and never cutting corners, you ensure your new floors not only look beautiful but also perform at their best for the long haul.